Eclipse Jubula is a new addition to the Eclipse universe. ItÔÇÖs a functional UI testing tool that allows you to specify and run tests.Jubula consists of plug-ins for an IDE and a standalone RCP application.
In this tutorial we will create a simple RCP java product and then we’ll use Jubula testing tool to execute some automated tests. First we will create a minimal RCP application, using the Plug-in Project creation Eclipse Wizard. The next step will consist into setup the Jubula environment and the AUT Agent to link the application with jubula
The final step will be create some recorded tests and play them with Jubula. The result is a simple suite of tests that allow us to automatically run our tests saving our time. The main goal of this tutorial is show how to use Jubula testing tool with a RCP application.
Step 1: Setup Environment
First we have to setup the environment, downloading the Eclipse for Tester version:
Eclipse for Testers (Indigo Packages) The Eclipse Jubula Download
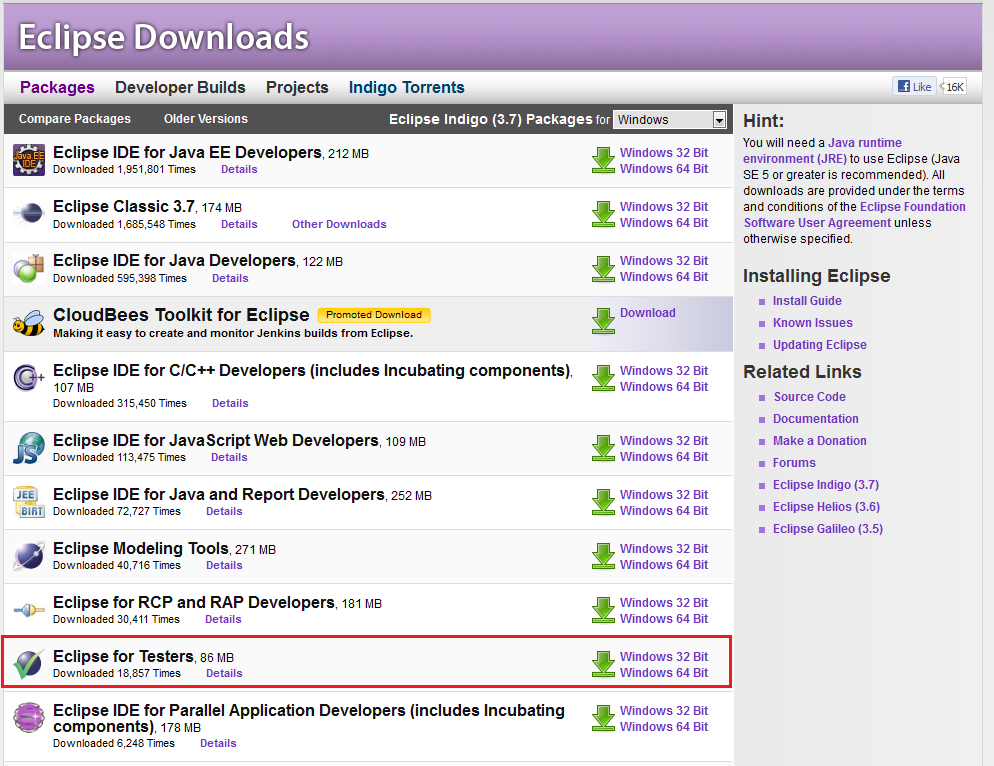
And Jubula Standalone application from: The Jubula StandAlone Download

Step 2: Create the Plugin Project
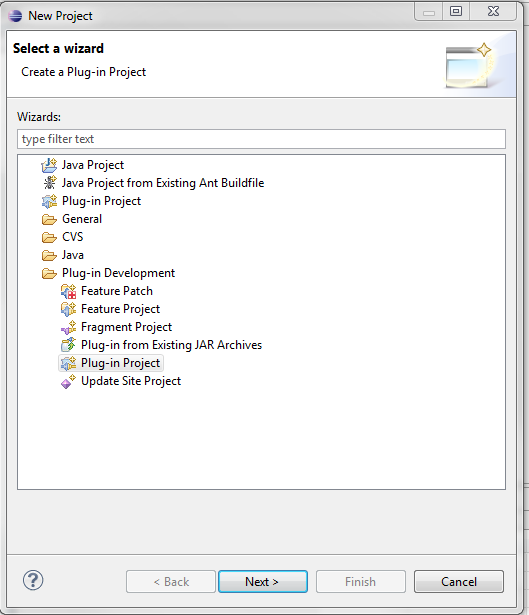
The next step is create a new Plug-in Project. To do this, follow the steps showed in the figures below. From menu File select New then Plug-in Project
(File/New/Project/Plug-in Development/Plug-in Project):
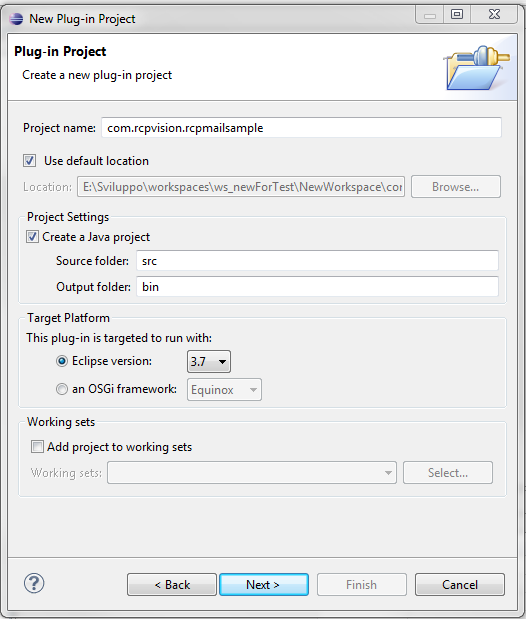
As Plug-in name enter ÔÇ£com.rcpvision.rcpmailsampleÔÇØ.
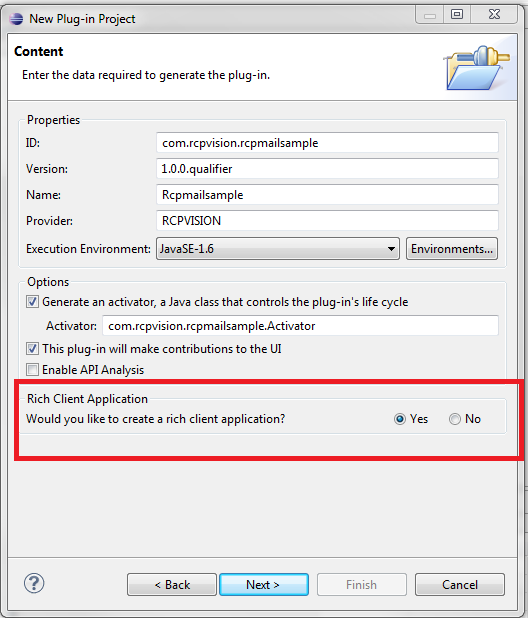
Next, tell Eclipse that itÔÇÖs a rich client application:
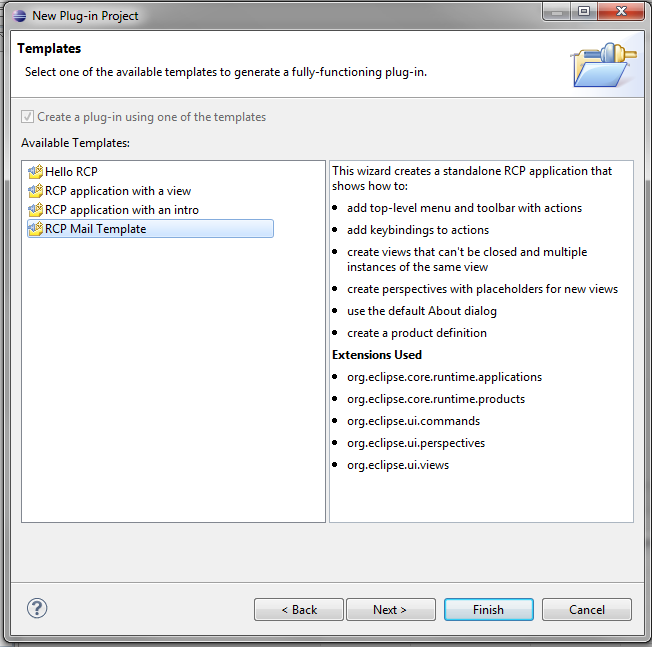
And finally, choose the ÔÇ£RCP MailÔÇØ template:
Select “Yes” if you want to switch to the Plug-in development perspective.
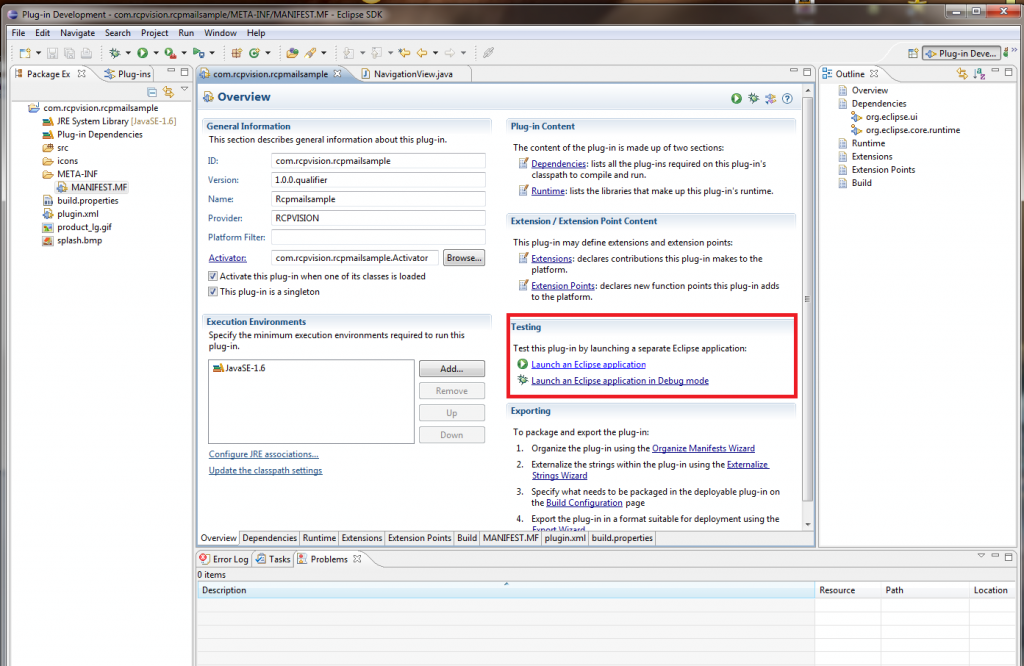
You should now see the project MANIFEST.MF editor. It contains mainly the information about the dependencies from other projects and the exporting options. From here you can manage the project and launch it. Just click ÔÇ£LaunchÔÇØ as showed below.
Step 3: Create the Product
In order to use Jubula application you need to create a product configuration for the application just created. Starting from:
(File/New/Product Configuration)
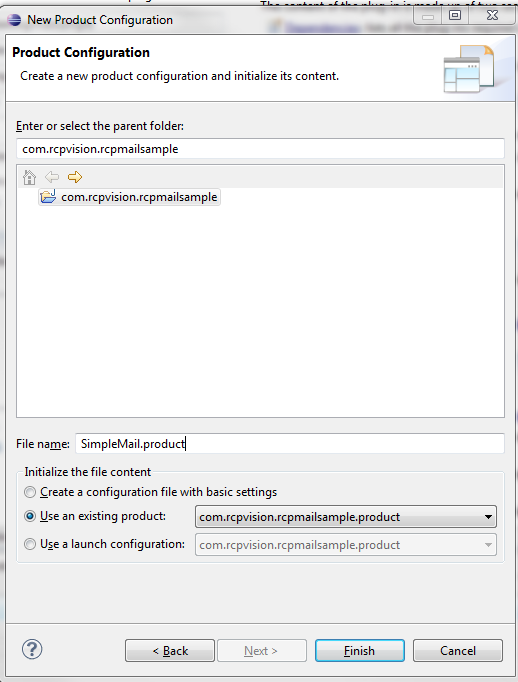
Name it “SimpleMail.product”
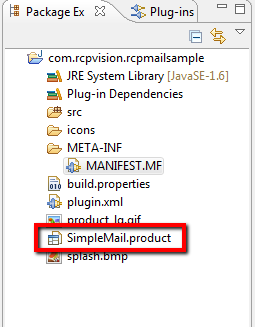
To finish click on Finish button and in the com.rcpvision.rcpmailsample plugin will appear the SimpleMail.product file
Then export the Plugin Project:
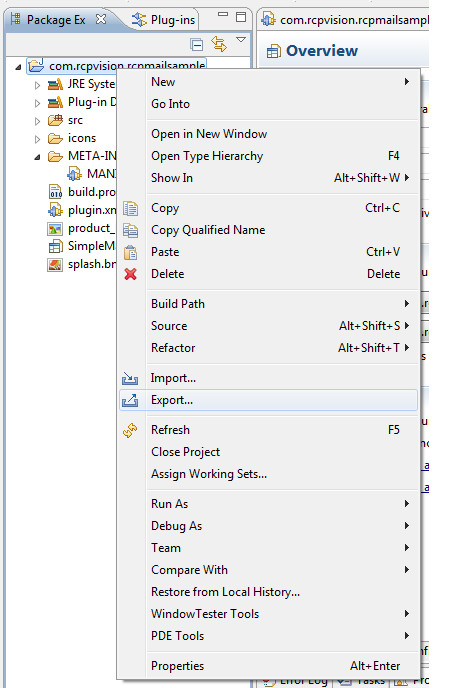
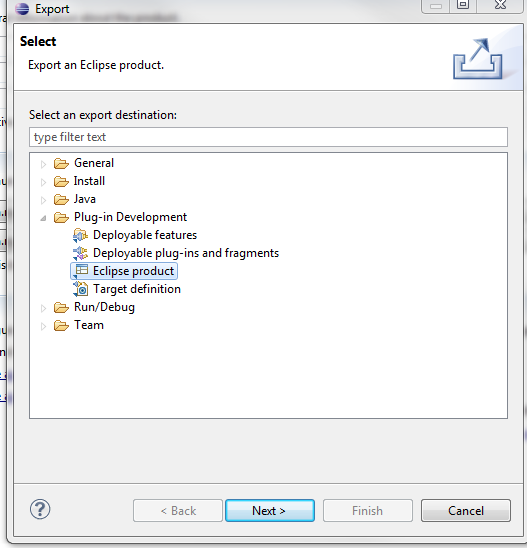
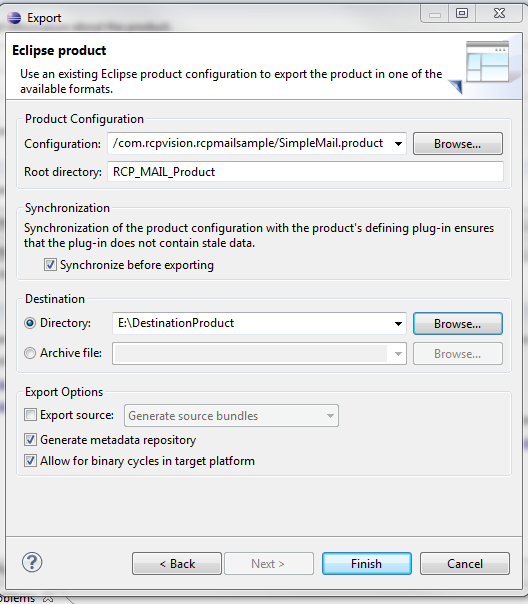
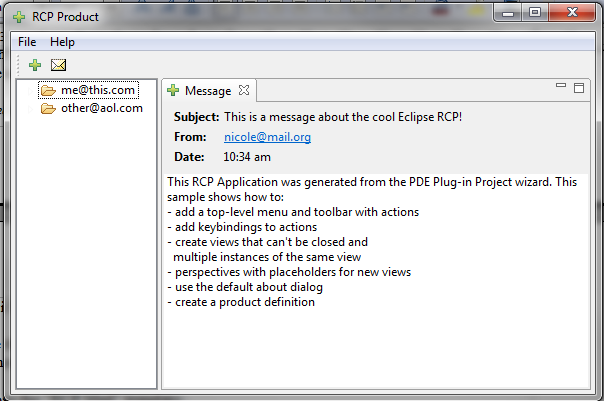
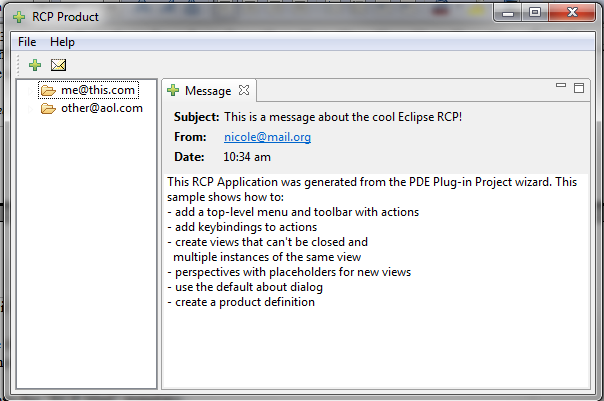
The result should be a product like this one:
Step 4: Set and launch AUT Agent
The AUT Agent is the Jubula daemon providing the bridge between the test executor and the Application Under Test.
Once the AUT Agent has started the AUT, object mapping can take place, and tests can be observed and executed.
Step 4.1: Set AUT Agent
Launch ÔÇ£setup.exeÔÇØ to install the AUT AGENT (Application Under Test Agent)
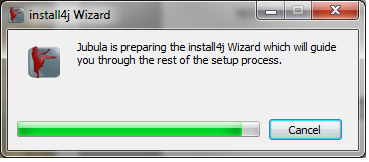
Accept the agreement then click on “Next”
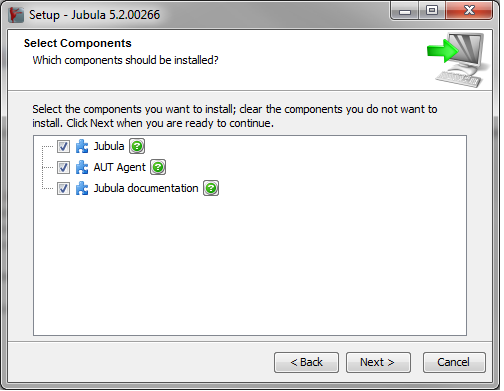
click again “Next” and finally…..
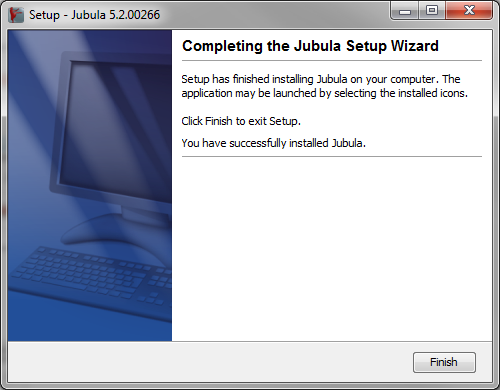
Step 4.2: Launch AUT Agent
To execute AUT Agent under Windows you need administrator rights:
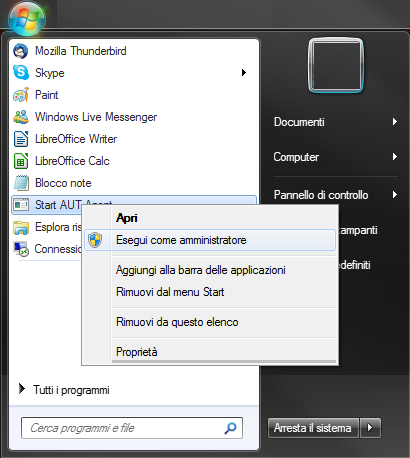
And you’ll see a little green icon ![]() on your toolbar.
on your toolbar.
Step 4.3: Configuring the Product to work with Jubula
In order to work with Jubula under RCP mail product you need to extract the rcp-support.zip in your Jubula (AUT Agent) installation directory and copy it into your product directory (plugins folder) .
This will add a Jubula instrumentation plugin to your product. YouÔÇÖve still got to activate that plugin, and you can do that by editing the configuration/config.ini file in your product directory.
ThereÔÇÖs a long line in that file listing the osgi.bundles, and you have to add the Jubula plugin at the end:
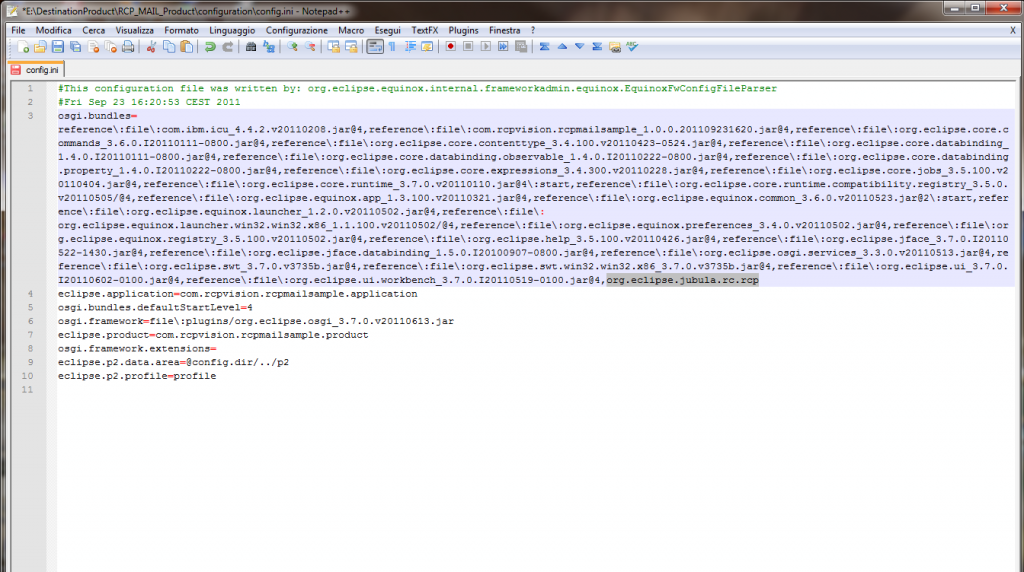
And finally, after all these steps, you’re ready to work with Jubula!!!
Step 5: Working with Jubula
You are finally ready to open Jubula and create your first tests
Step 5.1: Start Jubula
Step 5.2: Create new Test Project
Looking at the problem view, youÔÇÖll find a hint about what to do next:

However, it doesnÔÇÖt tell you how to create a new project. You will find it in the Test menu:
(Test/New)
Give your project a good name, choose ÔÇ£rcpÔÇØ as toolkit and click the ÔÇ£NextÔÇØ button.
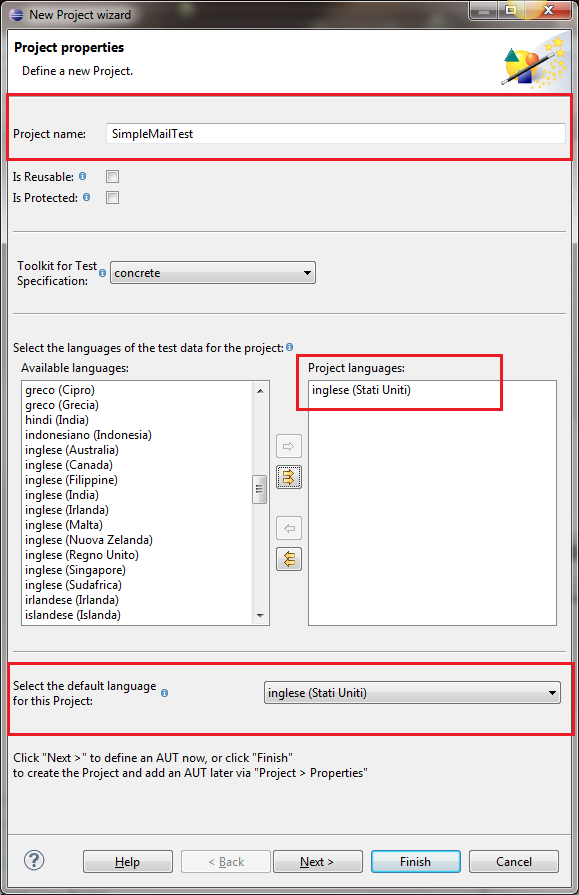
Pitfall: Make sure your test specifies either English (United States) or German (Germany)as the keyboard layout. These are the only two keyboard layouts provided out-of-the-box by Jubula at the moment.
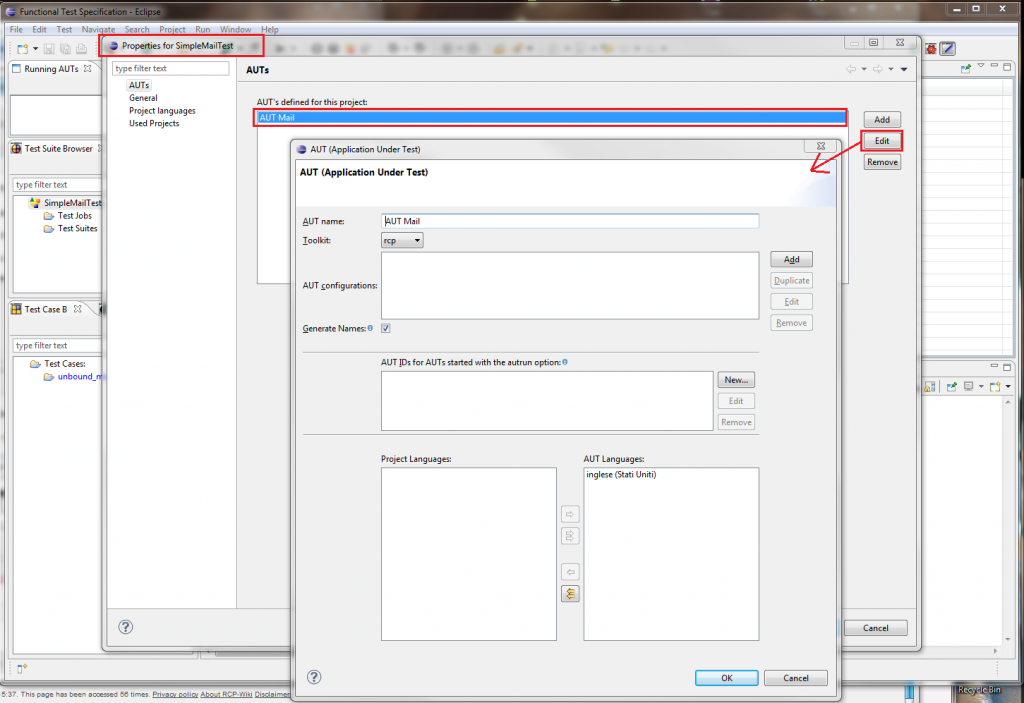
Now youÔÇÖve got to tell Jubula about your test object (Jubula calls it ÔÇ£AUTÔÇØ):
Give your AUT Agent a name and choose “rcp” as toolkit.
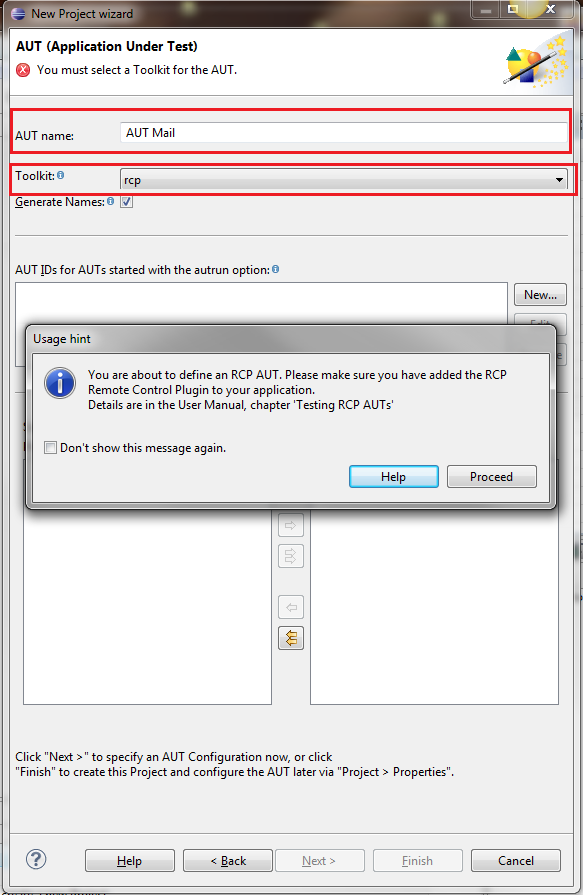
Click on “Proceed” to close the dialog and to continue working on New Project Wizard dialog.
Now you can choose to specify an AUT Configuration, by clicking on “Next” or click “Finish” and finish creating the project and configure the AUT later via “Project -> Properties”
Choosing to close the wizard menu, click on “Finish”.
You can notice that in the Test Browser view there is a new project “SimpleMailTest”
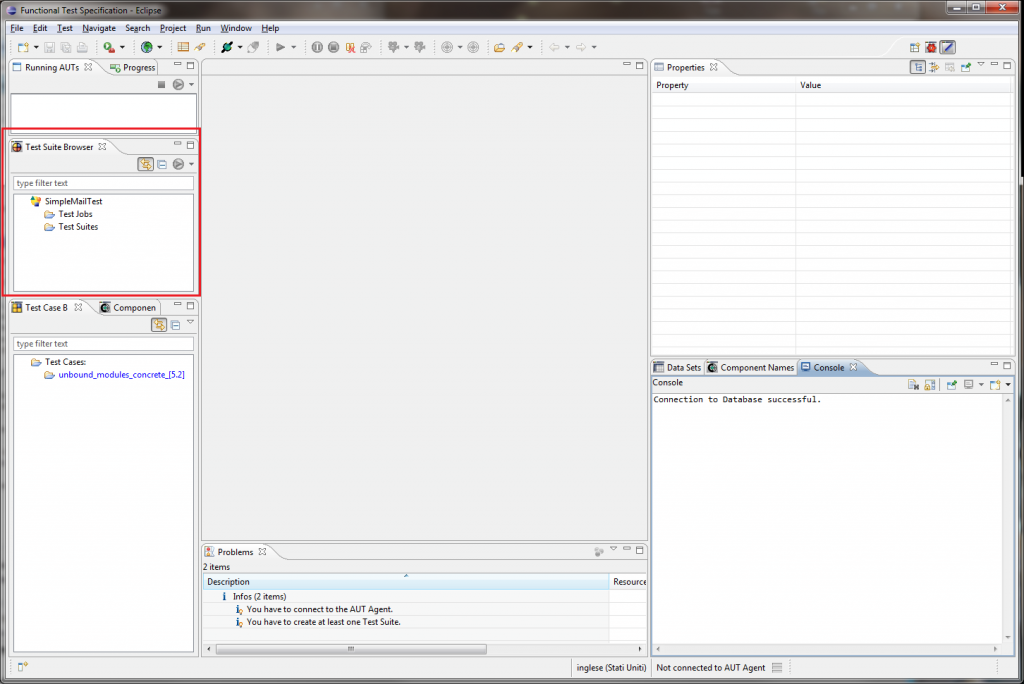
Step 5.3: Configuring AUT for Test Project
Focus on “Simple Test Mail” and click on
Test-> Properties
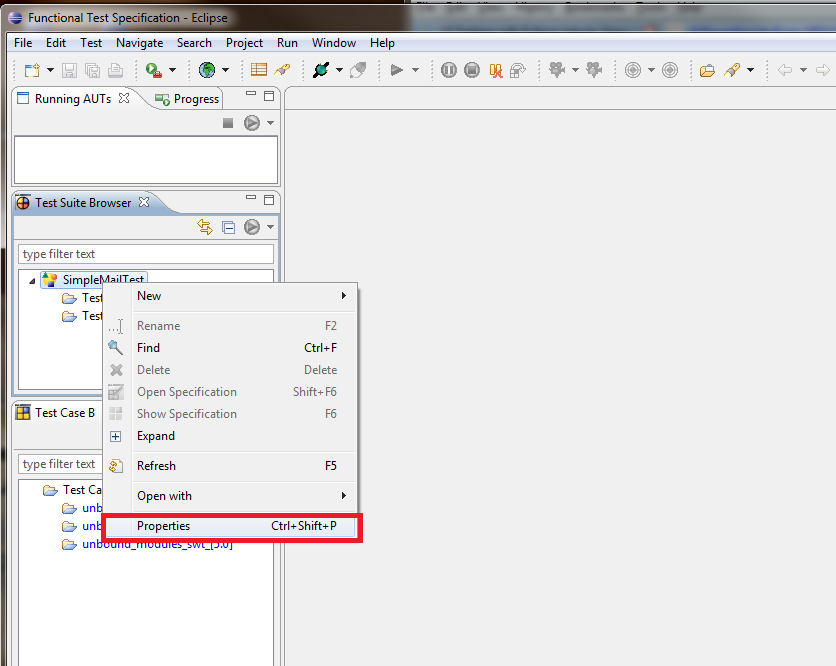
Click on “Add”
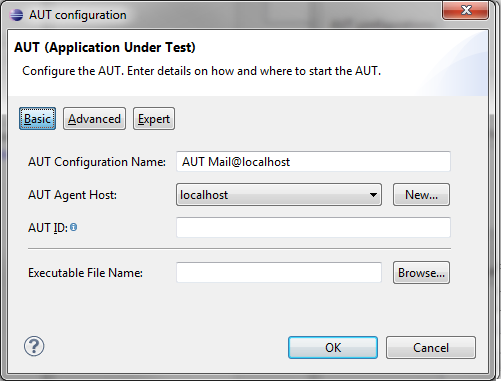
Enter a suitable name for the AUT Agent Host and select the executable file of your product in the “Executable File Name”
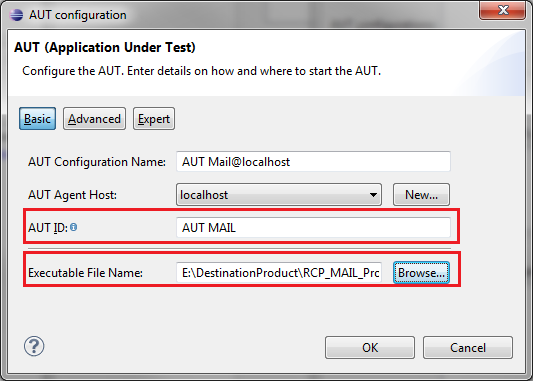
Clicking on “Ok” we create the test project. Then click on the little arrow next to ![]() , choose the option “localhost: 600000” to connect the AUT agent.
, choose the option “localhost: 600000” to connect the AUT agent.
Now, look for the ÔÇ£Connect to AUT AgentÔÇØ toolbar button and press it in order to establish the connection to the agent we started before:
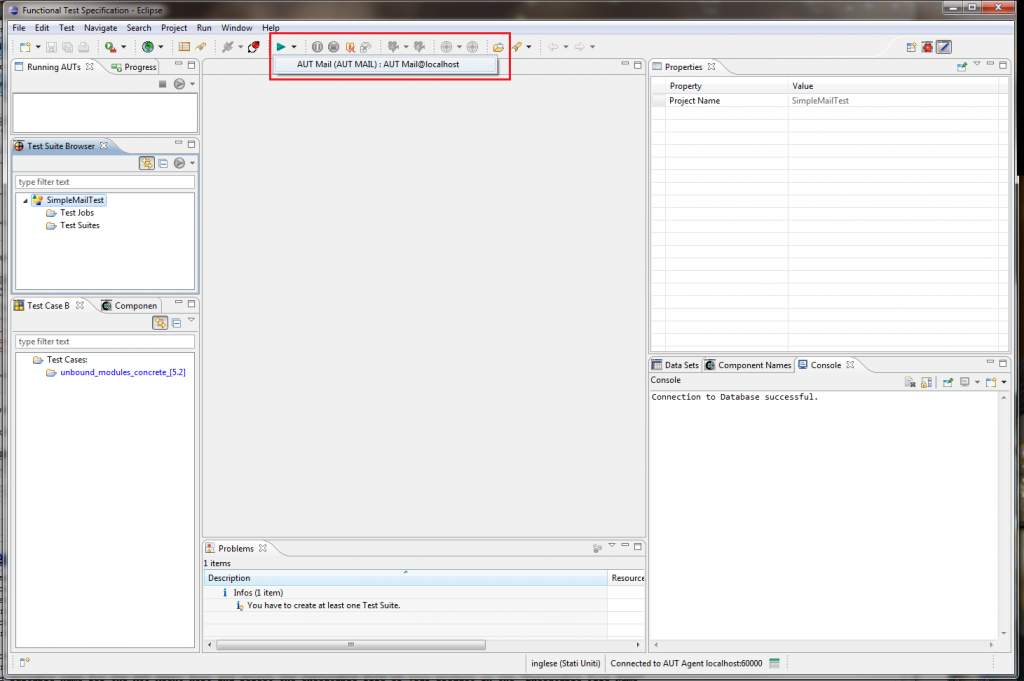
Confirm
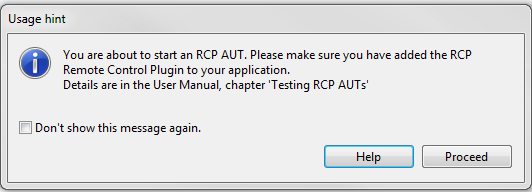
Click on Proceed and you’ll see your RCP Mail Template product
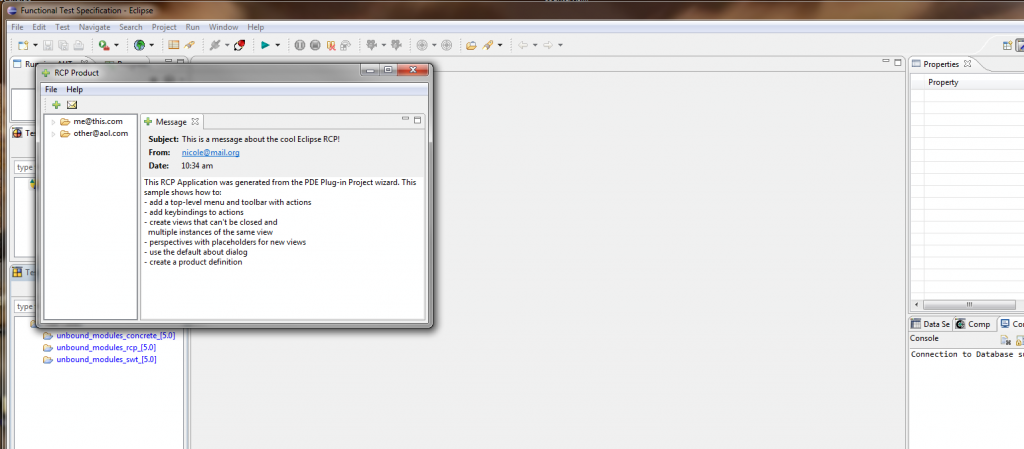
Step 6: Testing With Jubula
At the end of this section you’ll be able to create and run a set of test cases. LetÔÇÖs test the opening of a new messages view.
There are three methods to open a new Message view and for all of these we’ll show you how to do.
Case 1: Using Menu Bar: File-> Open Another Message View Command
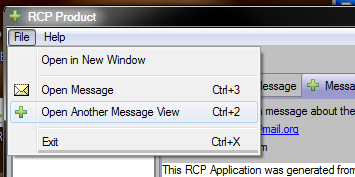
Case 2: Using toolbar button ![]()
Case 3: Using shortcut: CTRL+2
Test Case 1
Goal of this test case is to replay the
File  Open Another Message View
operation recording jubula commands.
Preconditions: Application under test (RCP Product) running.
Steps:
From Jubula IDE click on the ‘camera’ icon ![]()
Name the test Case with a suitable name, i.e. ÔÇ£OpenNewMessageViewÔÇØ
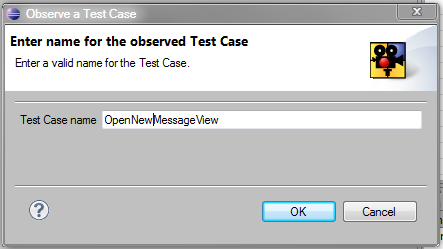
and confirm your choice by clicking on ÔÇ£OkÔÇØ button.
Jubula will move into the ÔÇ£TestCaseÔÇØ perspective with the ÔÇ£OpenNewMessageViewÔÇØ tab open in the editor and a new item ÔÇ£OpenNewMessageViewÔÇØ listed under the ÔÇ£Test Case BrowserÔÇØ view.
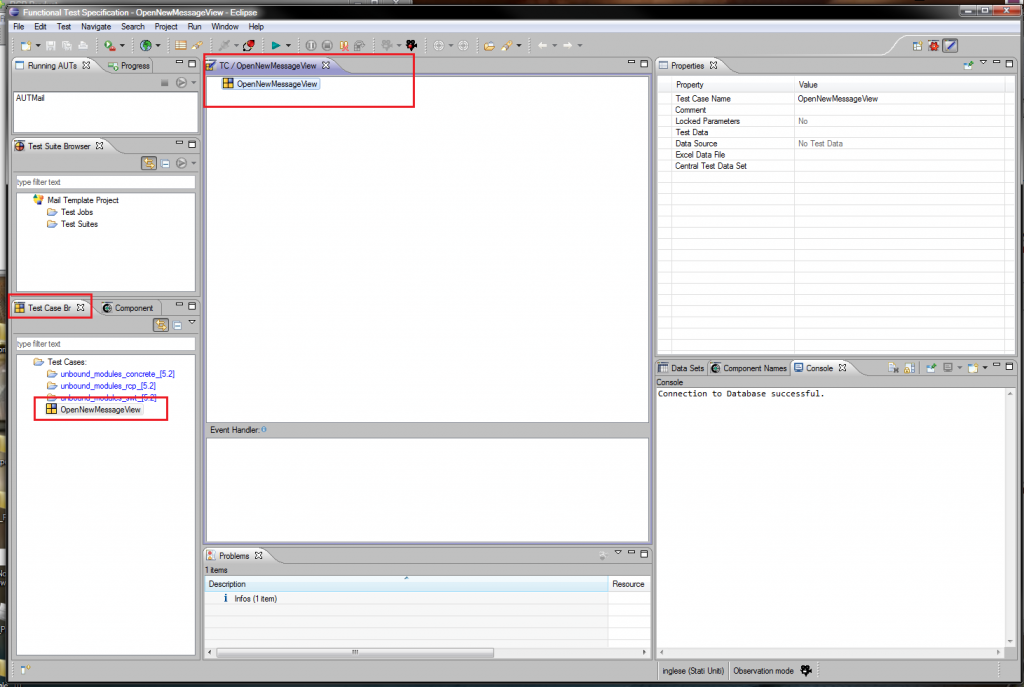
After few seconds the ÔÇ£Observation ConsoleÔÇØ window will be opened in the bottom corner of your screen. In this windows will be listed all the steps done during registration. Now give the focus on the application under test (RCPMAIL) and Select ÔÇ£File-> Another Message ViewÔÇØ option. You’ll create a new Message View in the RCPMail
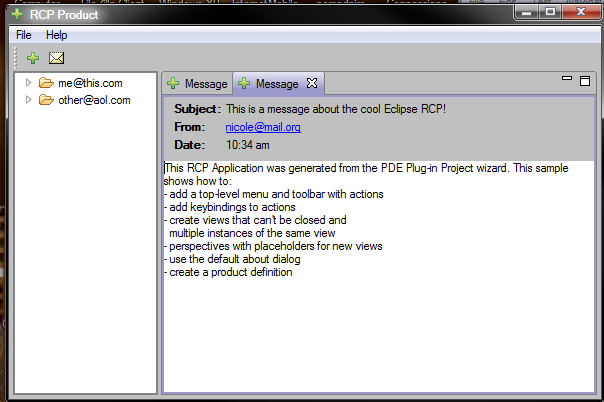
and in the ÔÇ£Observation ConsoleÔÇØ will be added two new steps:
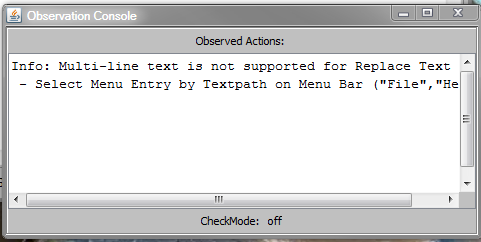
Stop the recording by clicking on ÔÇ£CameraStop Recording IconÔÇØ ![]()
Save the test case and in the Test Case perspective you’ll notice two steps under the your first test.
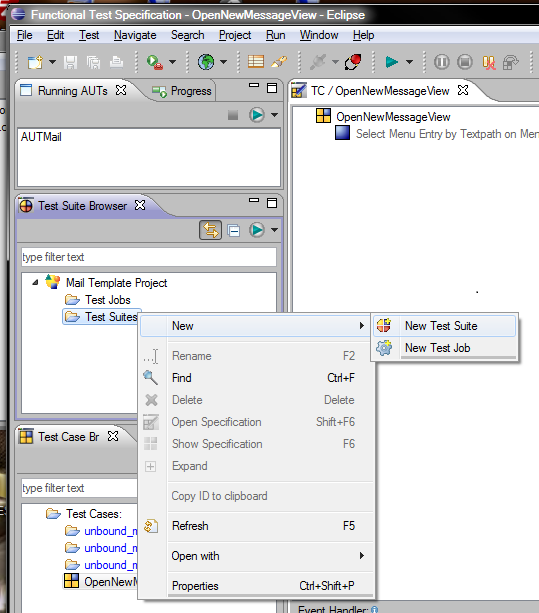
Now you have to create a new Test Suite: Within the ÔÇ£Test Suite BrowserÔÇØ view, right click on ÔÇ£Test SuitesÔÇØ folder and click on
New-> New Test Suite
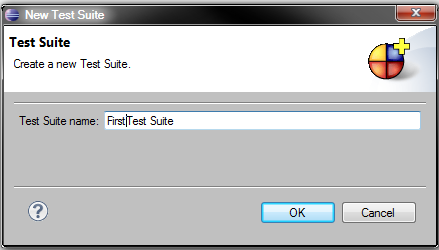
Name it as ÔÇ£First Test SuiteÔÇØ and confirm (Click on ÔÇ£OKÔÇØ)
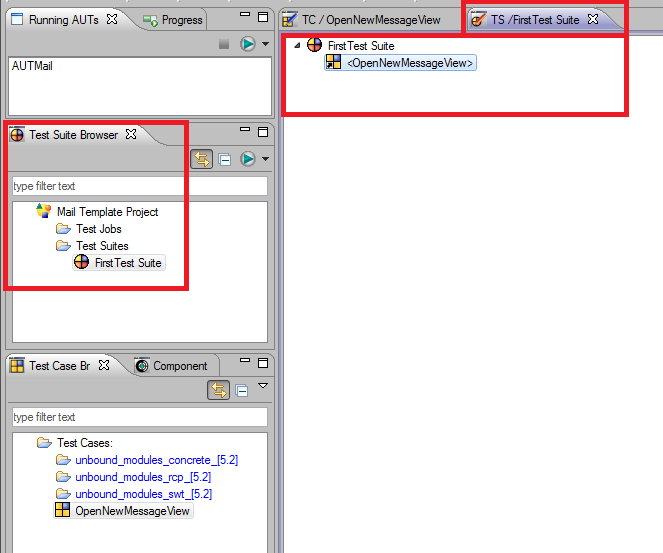
Double click on First Test Suite just created and it will be opened in an editor. Now drag your use case ÔÇ£OpenNewMessageViewÔÇØ into the test suite and save the test project:
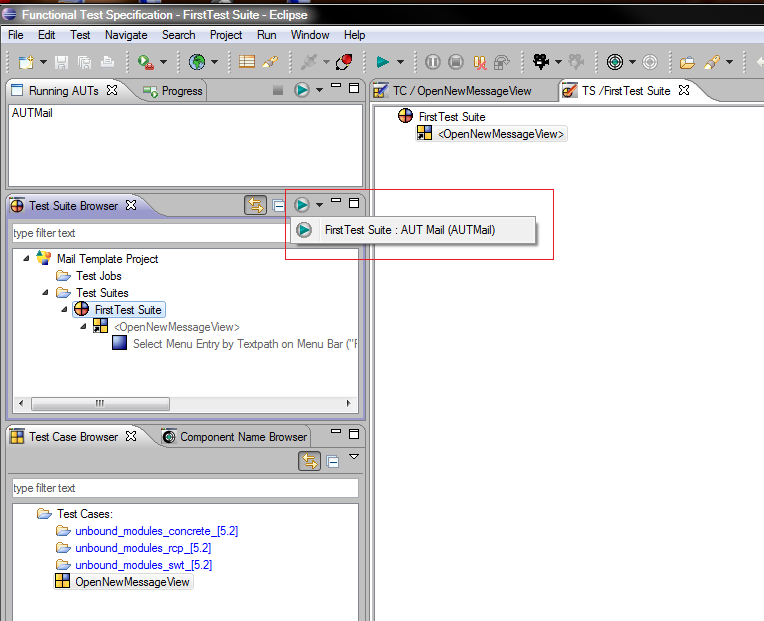
To play the test click on the little green icon in the ÔÇ£Test Suite BrowserÔÇØ then choose the ÔÇ£First Test Suite’
Test Case 2
Repeat previous steps to create a new Observed test case, record the steps to simulate the click on the green plus icon and the result will be:
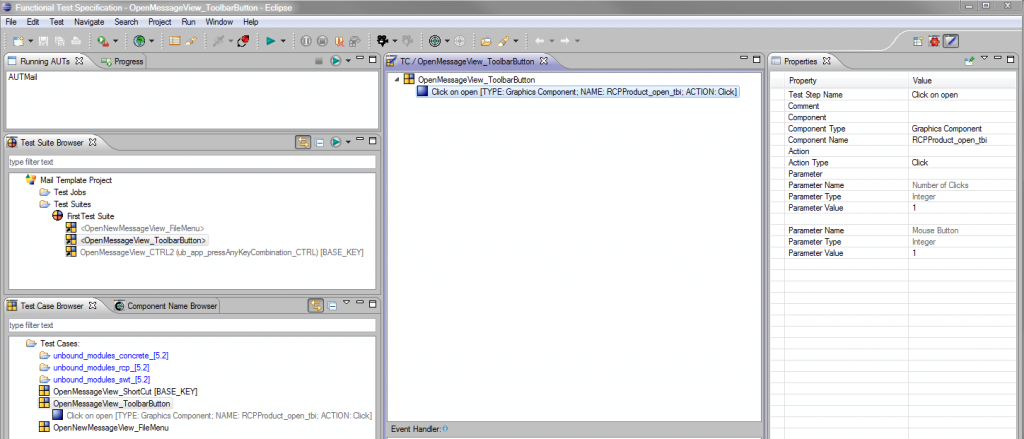
Test Case 3
You have to create this test case by choosing a couple of template from the Test Case folder in the Test Case Browser. To do it follow these simple steps: From the folder Test Cases in Test Case Browser open unbound_modules_concrete-> Actions (basic)  Input via Keyboard  Application  Key Combination and select the test case named
<ub_app_pressAnyKeyCombination_CTRL[BASE_KEY]>
and the
<ub_app_pressAnyKey>[MODIFER_KEYS;BASE_KEY]>
the result should be:
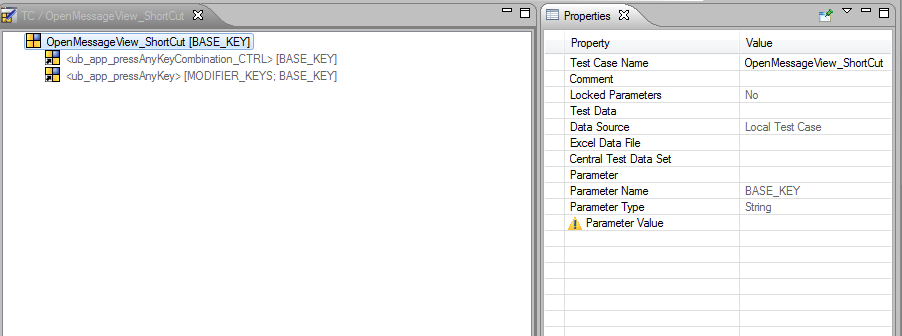
Now you have to complete the settings for the test case just choosen.
For
<ub_app_pressAnyKeyCombination_CTRL[BASE_KEY]>
Parameter Name = BASE_KEY
and
Parameter Value = 2

For
<ub_app_pressAnyKey>[MODIFER_KEYS;BASE_KEY]>
enter:
Parameter Name = MODIFIER_KEYS
Parameter Value = control
Parameter Name = BASE_KEY
Parameter Value = BASE_KEY

Test Suite
You can rename the first test case as “OpenNewMessageView_FileMenu”.
Drag and drop Test Case 2 and Test Case 3 to the Test Suite and you’ll have
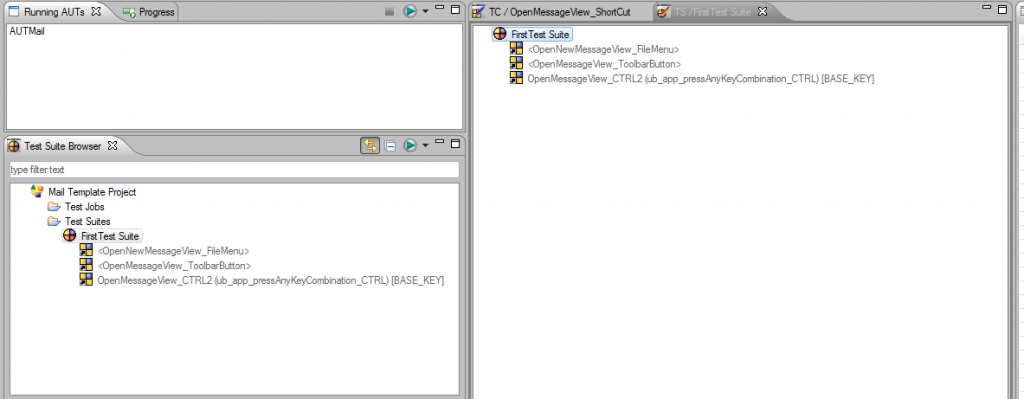
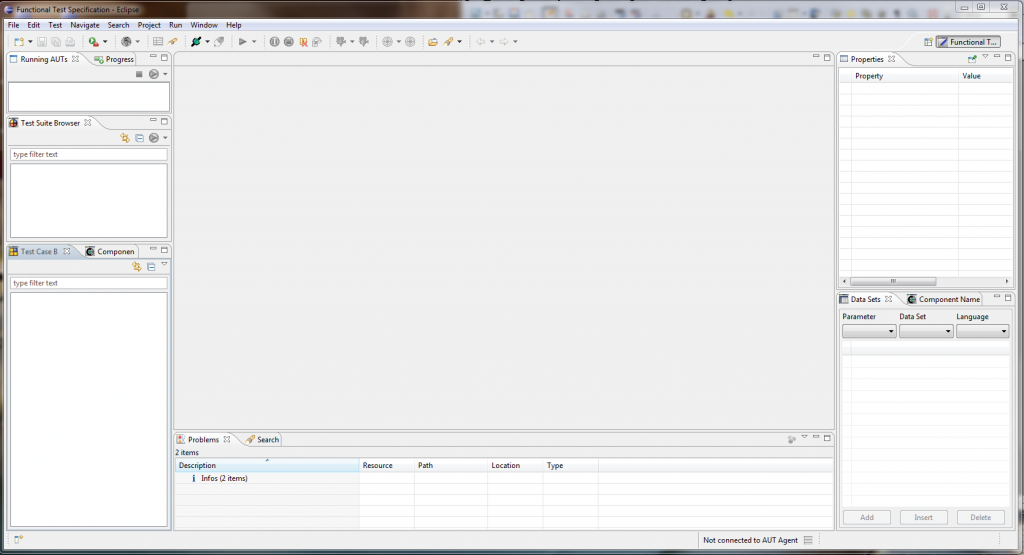
Run the test suite and … Enjoy your automated test with Jubula!!!

Hi,
I am trying this with an eclipse RCP workspace based application. The recording pieces all work for me, but my application doesn’t seem to be listening when I try to execute the tests. Do you have any ideas I might try?
Hi Ken,
have you checked off that your application appears in the “Running AUT’s” view?
If no, probably you have to verify that the AUT Agent configurations are correct, in addition you should be sure that the “org.eclipse.rc.rcp” plugin has been added in the config.ini file.
I hope this will help.
Why is this SOOOOO complicated and prompt to not working.
I tried Jubula last year and couldn’t make any useful test.
Won’t touch it until it has more sense.
Hi,
recorded a test successfully, but if I enter a url like “http://localhost:8080”, the test inserts “http;77localhost;8080”. There is something wrong with shift key.
Regards
Oliver
It will be good if you talked through how to use the Eclipse Juno Add-On for Jubula (i.e what you will use from within Eclipse). Another point is, this focuses on Windows only and I use Mountain Lion and Ubuntu. (No exes)
Hi,
I don’t know how the situation was back in January, but following your download instructions now (Dec 12) I couldn’t work through the tutorial:
– Jubula standalone now seems to be the same as Eclipse for Testers
– Using Eclipse for Testers, you can not create the plugin project you mention. For that, you need Eclipse for RCP/RAP developers.
Maybe you would like to correct the intro of your article. The rest of the tutorial is very good to get a first set of tests running. Thank you!
Hi,
great tutorial very easy to follow and detailed. I did everything using windows 7 64 bits and the RCP_MAIL_Product works fine.
I can record some steps like expanding the mails tree. However, when I’m recording and opening the File menu or clicking a toolbar icon, I get the following error:
An error has occurred. See error log for more details.
org.eclipse.ui.internal.PartPane.getToolBar()Lorg/eclipse/swt/widgets/Control;
Any idea to solve this? thank you.
It would be great a similar tutorial for swing applications.
I am about to execute my RCP application( sample mail app), i have loaded my project but it is not finishing…. any reason why it is not loading comletely ……… i have waited around 10 mins but i could not make,
I have executed the same steps with a swing app it is executing fine… so can any one tell me what would be the reason or sugest me what i have to do to execute the test case.
I want to check the check-box in table in RCP from Jubula. Can anybody help?